After months of trying to decide whether installing a third-party regulator was a good idea, I took the plunge and got myself a Robert Lane reg for my Air Arms S510 Ultimate Sporter. I love this rifle, but it has a pretty disappointing bell curve. I have always wanted to install a regulator but had to consider a) the cost, and b) the implications of drilling a vent hole in the air cylinder (there's no going back, in other words).
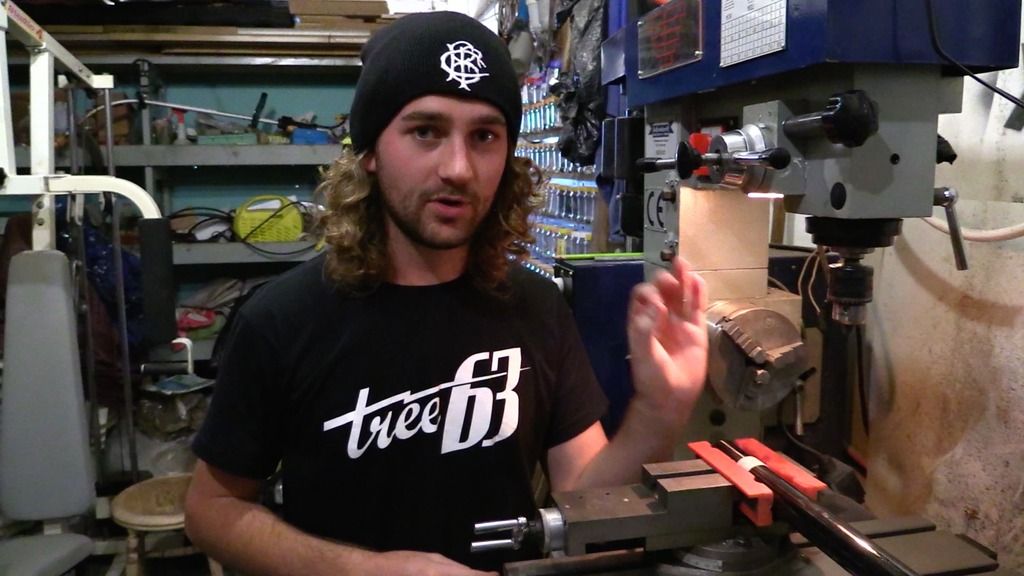
I had a chat with Robert in the UK (That man is like a fountain of knowledge...stand around and LEARN!) and decided the advantages WAY outweighed the disadvantages. Here are some pictures of the installation process - And the results.
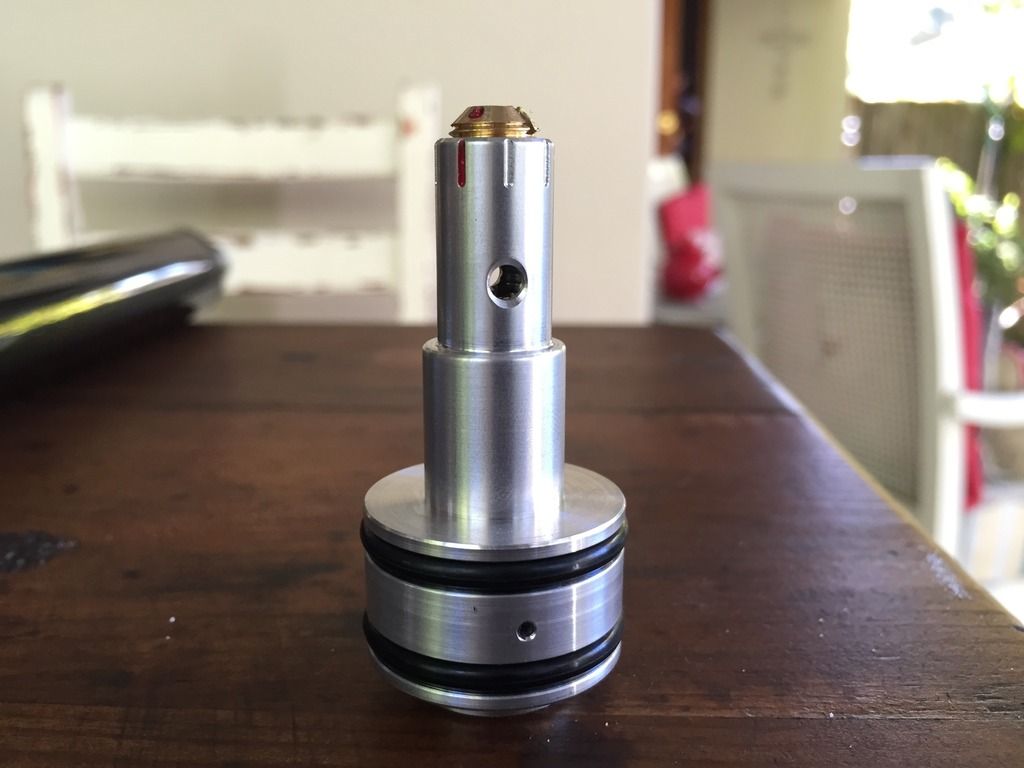
The Lane regulator seems extremely well built and came with plenty of spare parts. Screw on top adjusts regulated pressure.
I decided to use a lathe and a drill press...as opposed to a hand drill and a hacksaw. This is expensive stuff we're dealing with here!
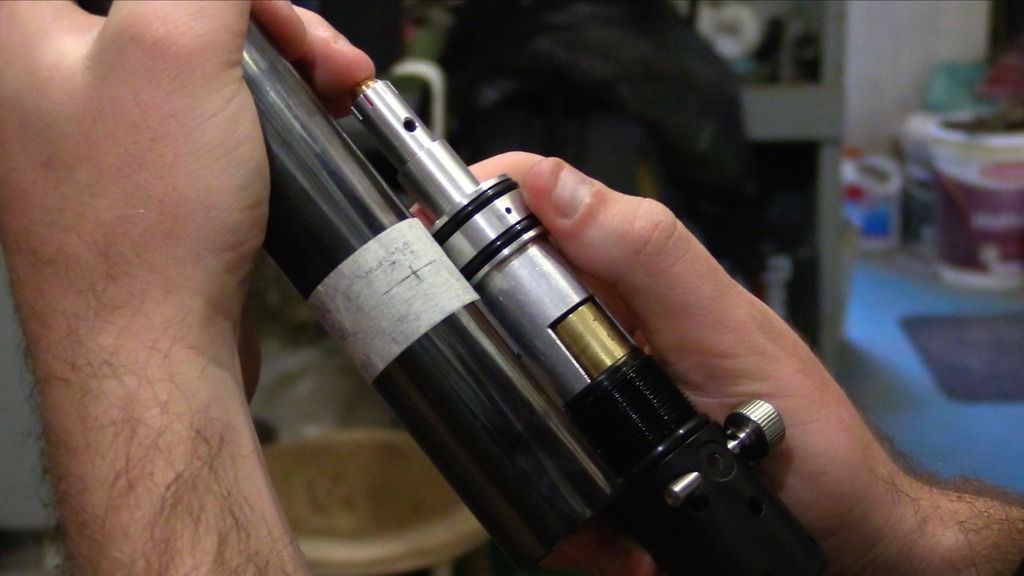
This photo shows the location of the vent hole. The vent hole needs to be located between the two outer o-rings on the regulator to allow it to "breathe". Drill your hole in the wrong place, and you have a problem!

The air pot needed to be cut shorter so that the regulator could be fitted in the correct position.
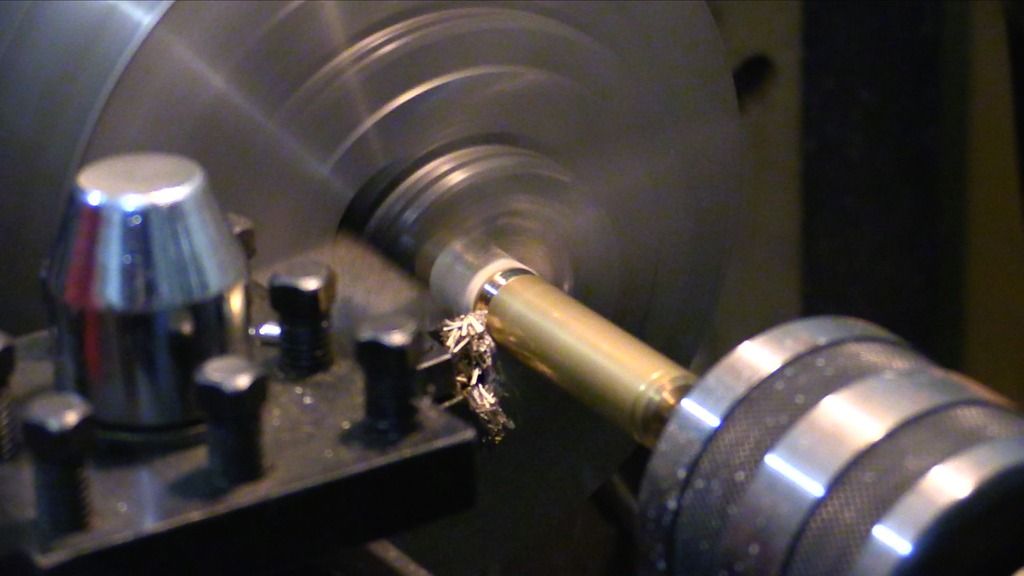
The air pot being shortened on the lathe.
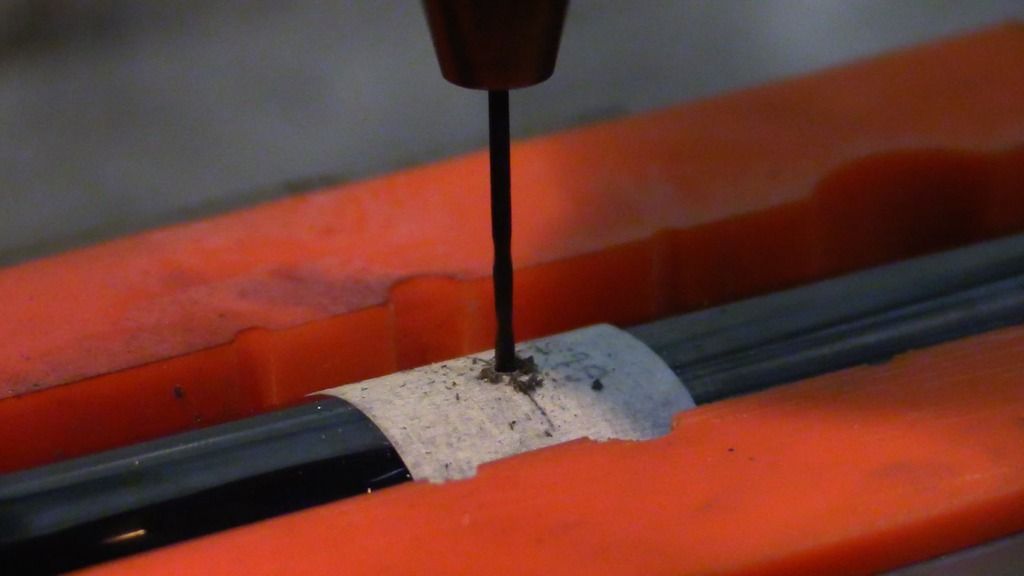
The lane regulator kit includes the correct size drill bit for the vent hole. The hole needs to be de-burred on the inside to prevent the o-rings of the reg being damaged.
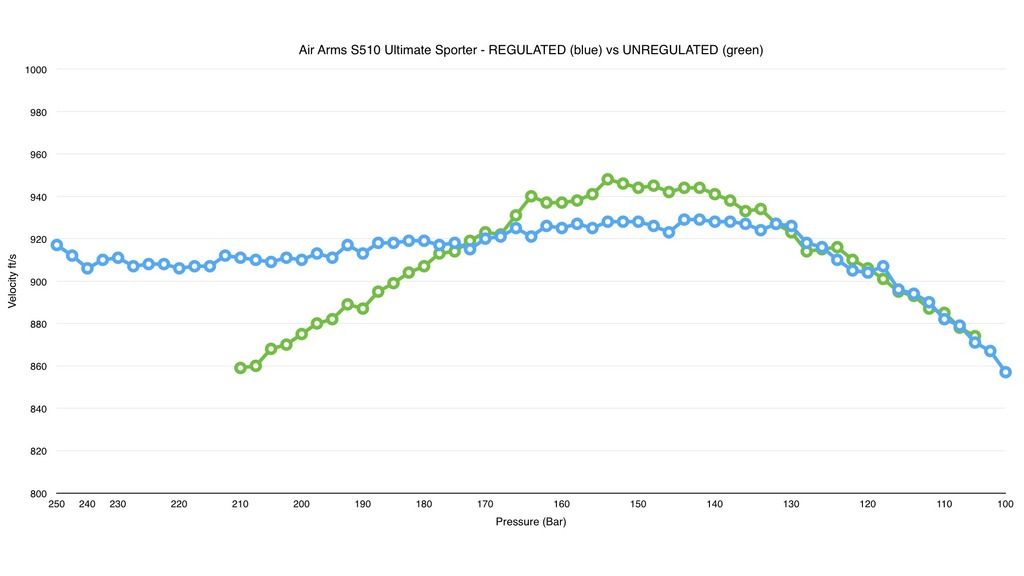
These are my initial results with NO additional adjustments to the hammer, valve or transfer port. As you can see, the regulator is set to 135 Bar - All shots above 135 Bar are very consistent, and after 135 Bar the regulator cuts out and the shot strings look exactly the same. Note that I am filling to 250 Bar - The Air Arms cylinders can hold pressure way over 250, but "max fill pressure 200 bar" is printed on the cylinder because when unregulated, the valve cannot operate correctly above 200 Bar.
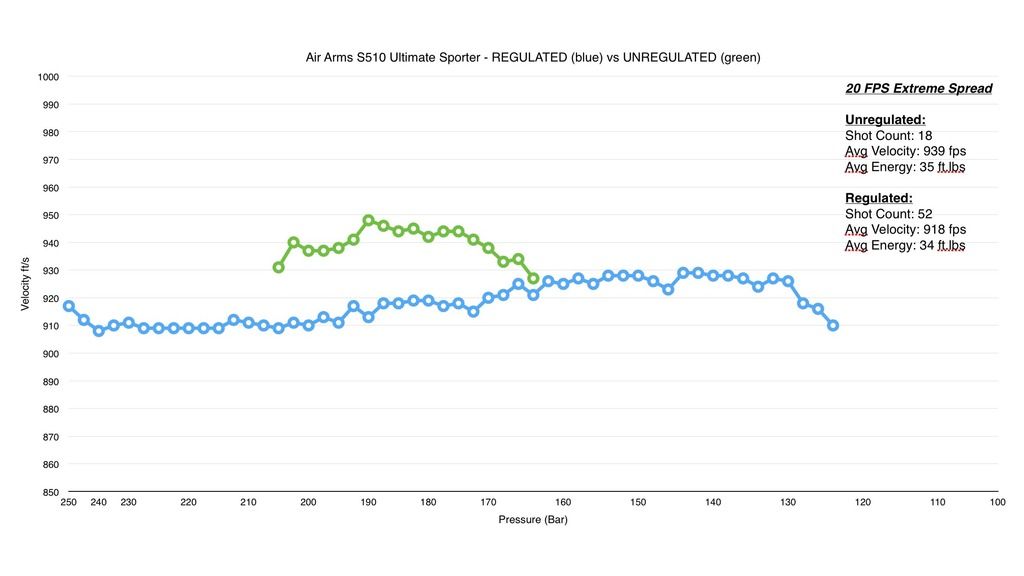
And here's what the graph looks like when I only include shots within an extreme spread of 20 fps. The difference in shot count is insane - 52 shots as opposed to 18, and I only lose one or two foot pounds of energy.
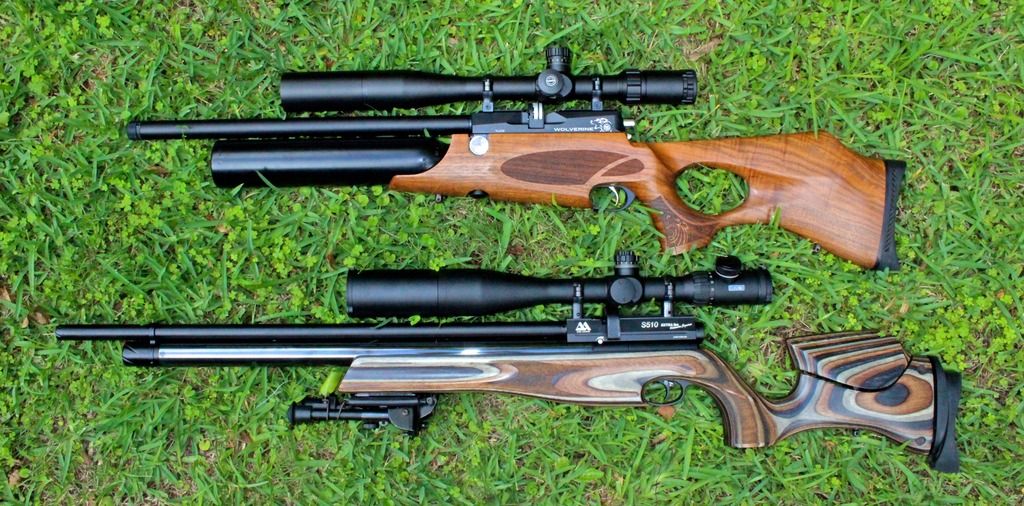
Lastly, here's a photo of the Ultimate Sporter (bottom). I intend to modify the hammer by lightening it a little (drilling holes in the hammer, fitting grub screws in the holes and adding/removing grub screws to modify the weight). Preferably, I would want this rifle to shoot at around 900 fps with 18gr JSBs - With an anti-bounce hammer and some more fine tuning I would like to see a shot count of around 70. That would put a smile on my face, as this really is a beautiful rifle that deserves to be used more often!
I had a chat with Robert in the UK (That man is like a fountain of knowledge...stand around and LEARN!) and decided the advantages WAY outweighed the disadvantages. Here are some pictures of the installation process - And the results.

The Lane regulator seems extremely well built and came with plenty of spare parts. Screw on top adjusts regulated pressure.

I decided to use a lathe and a drill press...as opposed to a hand drill and a hacksaw. This is expensive stuff we're dealing with here!

This photo shows the location of the vent hole. The vent hole needs to be located between the two outer o-rings on the regulator to allow it to "breathe". Drill your hole in the wrong place, and you have a problem!

The air pot needed to be cut shorter so that the regulator could be fitted in the correct position.

The air pot being shortened on the lathe.

The lane regulator kit includes the correct size drill bit for the vent hole. The hole needs to be de-burred on the inside to prevent the o-rings of the reg being damaged.

These are my initial results with NO additional adjustments to the hammer, valve or transfer port. As you can see, the regulator is set to 135 Bar - All shots above 135 Bar are very consistent, and after 135 Bar the regulator cuts out and the shot strings look exactly the same. Note that I am filling to 250 Bar - The Air Arms cylinders can hold pressure way over 250, but "max fill pressure 200 bar" is printed on the cylinder because when unregulated, the valve cannot operate correctly above 200 Bar.

And here's what the graph looks like when I only include shots within an extreme spread of 20 fps. The difference in shot count is insane - 52 shots as opposed to 18, and I only lose one or two foot pounds of energy.

Lastly, here's a photo of the Ultimate Sporter (bottom). I intend to modify the hammer by lightening it a little (drilling holes in the hammer, fitting grub screws in the holes and adding/removing grub screws to modify the weight). Preferably, I would want this rifle to shoot at around 900 fps with 18gr JSBs - With an anti-bounce hammer and some more fine tuning I would like to see a shot count of around 70. That would put a smile on my face, as this really is a beautiful rifle that deserves to be used more often!
