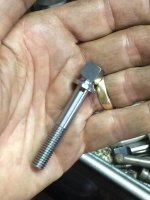
I figured I'd share my experience machining up a LW barrel blank to fit my BRK Ghost.
There are some good videos on youtube but not many that cover airgun barrels on hobby grade machines.
Starting point: BRK ghost .30 cal.
Objective: machine a .22 blank and the .22 probe.
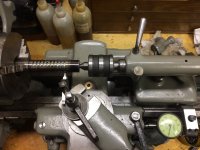
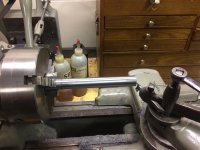
First a few pics of my equipment for reference.
Lathe is a little machine shop Hi Torque 8.5x20
Mill is a Precision Matthews with DRO.

For barrels, I order 3 varieties from LW. A .177, .22, and .25. All 600mm long. All have standard rifling (they do offer polygonal), all with a 1/17 twist, and all choked.

First order of business is to take some measurements and make a plan. I ended up referencing the .30 BRK barrel and some FX smooth twist barrels also.

Since the bore centerline cant be assumed to be concentric with the barrel OD, I built a "spyder" for the front of the chuck and another for the output side of the spindle. This allowed me to indicate the barrel in on the bore axis. To start, I used an indicator on both the OD of the front and back of the barrel to get it close.

Next step was to use some "pin gauges" to make final adjustments to align with the bore center.

I made a mistake here. Since the barrel was .22 nominal and choked, I assumed the choked end was the end which had a "C" stamp on it from LW. The largest pin gauge that fit was .215" so I proceeded to cut the crown and muzzle threads. I didnt realize my mistake until I flipped the barrel around to machine the breech end and the .215 gauge pin didnt fit! Oh well. Lesson learned. I had to cut off just over 1/2" off (the breech/unchoked end) and start again.
For the benefit of those who arent familiar with the manual thread cutting process, I'll explain the steps to single point thread the muzzle.
I wanted to cut a 1/2" UNF 20TPI thread pattern. The first two things to determine are the Major diameter and the thread gutter depth.
The best way to do this is with the Machinery's Handbook.


The Major diameter I chose is the median between max & min specs (.494"). The gutter diameter is just a few thou smaller than the minor diameter. I used .437"
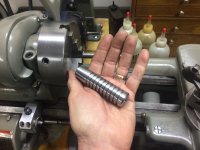
Below is a pic of the thread gutter cut to depth.

Next up is to reduce the OD to the major diameter.

Small chamfer added to aid in thread starting.

Since this is a hobby grade lathe, I had to change the gears which drive the lead screw to match 20TPI. This is done by referencing the chart on the machine.
The numbers apply to the tooth count on the gears. Diagram on bottom left shows gear position.

Here are the gears in place.

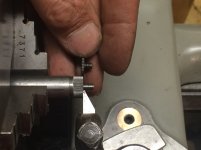
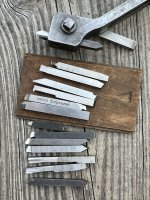
Onto the single point threading.

The engineering method to determine when the threads have reached correct depth is to measure them with "thread wires," but its a bit of a hassle.
I had a few different brands of LDCs on hand. I machined them until the fit was just a bit looser than "no play."

Next up is the crown. I experimented a bit here and tried 4 different ways. The objective is to make sure the pellet has a clean exit (no burrs) and to ensure the exit hole
is perfectly concentric with the bore centerline. I found a fantastic channel on the net called sub12airgunners. That guy is really impressive. The two methods he uses
are to either use a simple chamfer tool, or to use a die grinder cutoff disk rotating up and away from the center. Below is the cutoff disk method.
The result looked a bit rough. I did the Q-tip test to see if dragging it out would pull any cotton fibers (hooked on burr). It was clean.

Next, I tried the chamfer tool.

It was Ok but did have a few small burrs. Nothing that couldnt be fixed with a light polish but I ended up settling with a carbide 11deg cutter specifically for cutting crowns, then finished up with the dremel stone (similar configuration to the cutoff disk picture).


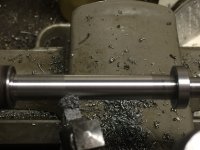
Muzzle done. Onto the breech end. First I chucked it up in the spider to cut the OD to match the factory Ghost barrel.
The surface finish was just OK. My cheap chinese carbide inserts are spec'd more for aluminum, so I used a green scotch-bright pad to cover up the evidence.
I think another factor was the "stick out." The barrel was held in a "spyder" in a chuck and still had a few inches of stick out. The super light cuts necessary generally arent well suited for carbide tooling.

Now that the OD of the breech end was concentric with the bore centerline, I removed the spider and re chucked in the 3 jaw. I double checked bore runout with an indicator and it was just .0003". I'll take that! Next step was to cut the leade. There isnt a lot of good information on how to do this on an airgun. On traditional firearm barrels, a specialized lead cutter/reamer is used. But since they arent compatible with the profile of an airgun breech, it was a manual process. Next step was the remove the rifling to just past where the transfer port hole would be milled.

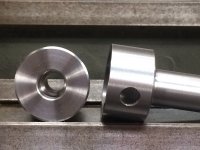
You can see the rifling is perfectly centered in the bore. Proof the work was done on bore centerline.

Seems I've reached the picture limit for one post. I'll continue on in post 2 of 2 (same title).
There are some good videos on youtube but not many that cover airgun barrels on hobby grade machines.
Starting point: BRK ghost .30 cal.
Objective: machine a .22 blank and the .22 probe.
First a few pics of my equipment for reference.
Lathe is a little machine shop Hi Torque 8.5x20
Mill is a Precision Matthews with DRO.
For barrels, I order 3 varieties from LW. A .177, .22, and .25. All 600mm long. All have standard rifling (they do offer polygonal), all with a 1/17 twist, and all choked.
First order of business is to take some measurements and make a plan. I ended up referencing the .30 BRK barrel and some FX smooth twist barrels also.
Since the bore centerline cant be assumed to be concentric with the barrel OD, I built a "spyder" for the front of the chuck and another for the output side of the spindle. This allowed me to indicate the barrel in on the bore axis. To start, I used an indicator on both the OD of the front and back of the barrel to get it close.
Next step was to use some "pin gauges" to make final adjustments to align with the bore center.
I made a mistake here. Since the barrel was .22 nominal and choked, I assumed the choked end was the end which had a "C" stamp on it from LW. The largest pin gauge that fit was .215" so I proceeded to cut the crown and muzzle threads. I didnt realize my mistake until I flipped the barrel around to machine the breech end and the .215 gauge pin didnt fit! Oh well. Lesson learned. I had to cut off just over 1/2" off (the breech/unchoked end) and start again.
For the benefit of those who arent familiar with the manual thread cutting process, I'll explain the steps to single point thread the muzzle.
I wanted to cut a 1/2" UNF 20TPI thread pattern. The first two things to determine are the Major diameter and the thread gutter depth.
The best way to do this is with the Machinery's Handbook.
The Major diameter I chose is the median between max & min specs (.494"). The gutter diameter is just a few thou smaller than the minor diameter. I used .437"
Below is a pic of the thread gutter cut to depth.
Next up is to reduce the OD to the major diameter.
Small chamfer added to aid in thread starting.
Since this is a hobby grade lathe, I had to change the gears which drive the lead screw to match 20TPI. This is done by referencing the chart on the machine.
The numbers apply to the tooth count on the gears. Diagram on bottom left shows gear position.
Here are the gears in place.
Onto the single point threading.
The engineering method to determine when the threads have reached correct depth is to measure them with "thread wires," but its a bit of a hassle.
I had a few different brands of LDCs on hand. I machined them until the fit was just a bit looser than "no play."
Next up is the crown. I experimented a bit here and tried 4 different ways. The objective is to make sure the pellet has a clean exit (no burrs) and to ensure the exit hole
is perfectly concentric with the bore centerline. I found a fantastic channel on the net called sub12airgunners. That guy is really impressive. The two methods he uses
are to either use a simple chamfer tool, or to use a die grinder cutoff disk rotating up and away from the center. Below is the cutoff disk method.
The result looked a bit rough. I did the Q-tip test to see if dragging it out would pull any cotton fibers (hooked on burr). It was clean.
Next, I tried the chamfer tool.
It was Ok but did have a few small burrs. Nothing that couldnt be fixed with a light polish but I ended up settling with a carbide 11deg cutter specifically for cutting crowns, then finished up with the dremel stone (similar configuration to the cutoff disk picture).
Muzzle done. Onto the breech end. First I chucked it up in the spider to cut the OD to match the factory Ghost barrel.
The surface finish was just OK. My cheap chinese carbide inserts are spec'd more for aluminum, so I used a green scotch-bright pad to cover up the evidence.
I think another factor was the "stick out." The barrel was held in a "spyder" in a chuck and still had a few inches of stick out. The super light cuts necessary generally arent well suited for carbide tooling.
Now that the OD of the breech end was concentric with the bore centerline, I removed the spider and re chucked in the 3 jaw. I double checked bore runout with an indicator and it was just .0003". I'll take that! Next step was to cut the leade. There isnt a lot of good information on how to do this on an airgun. On traditional firearm barrels, a specialized lead cutter/reamer is used. But since they arent compatible with the profile of an airgun breech, it was a manual process. Next step was the remove the rifling to just past where the transfer port hole would be milled.
You can see the rifling is perfectly centered in the bore. Proof the work was done on bore centerline.
Seems I've reached the picture limit for one post. I'll continue on in post 2 of 2 (same title).
