FX 500 Regulator Adjusting

My FX 500 just had a regulator installed about 2 months ago and it was capable of shooting 880fps. Today I thought I'd check the velocity and it had dropped to the 855-860 range. The first thing I did was shoot my Vulcan through the chrony to make sure it wasn't giving me some bad data. It looked good. I then check my HS adjuster to make sure it hadn't backed out any and it was snug as well. Next step was to try and gain back the 20-25fps just by adjusting the hammer spring and that didn't gain me anything.

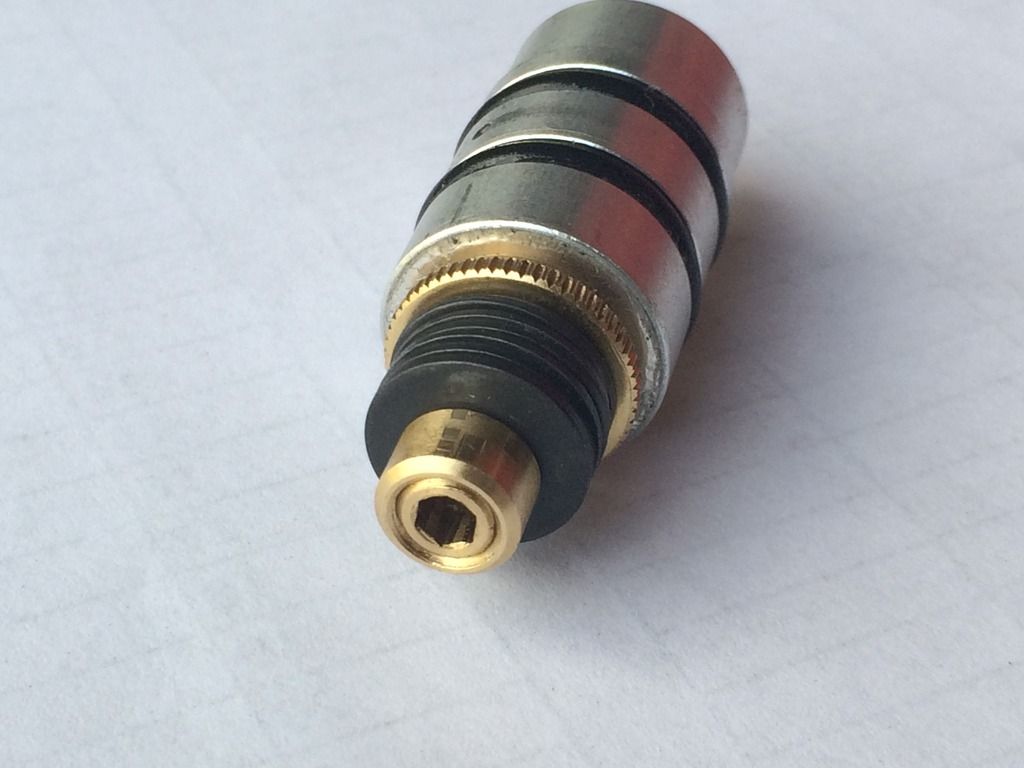
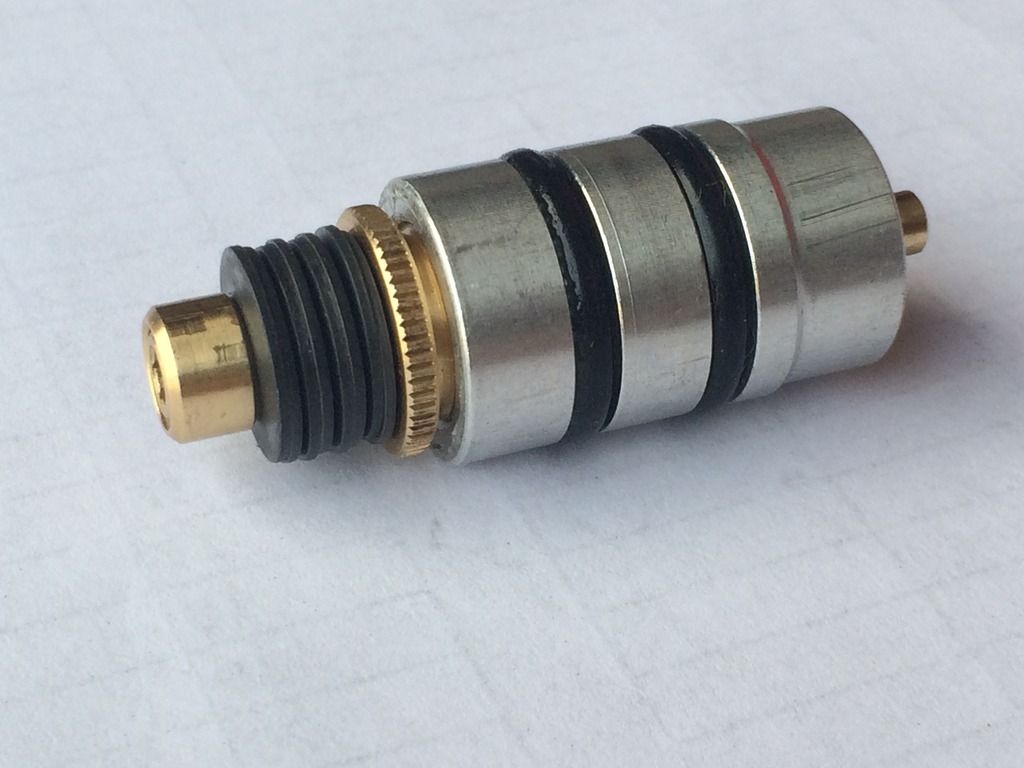
Next attempt at fixing the problem was to adjust the regulator. Having never attempted this on a FX I remembered Ernest posting a video on removing the regulator and explaining how it was assembled. I pulled the regulator without any issues and by holding the gold (brass) ring with a pair a pliers I tightened the screw on the end of the regulator a 1/8 turn CW. Upon reassembly this gave me a further drop to 827fps, so back out with the regulator and this time I went a 1/4 turn CCW and re-assembled the gun. This got me back up to 860 so I pulled the regulator back out and went another 1/8 turn CCW and ended up at 870fps. I might add, adjusting the HS CW didn't gain any addition velocity. I quit for the evening at this point so if anyone has the proper technique please share you knowledge. If nothing else I did learn how to remove the regulator which was really simple.
jimmy
 
Jimmy, you're on the right track here, that's for sure.
There's only one thing to keep in mind when adjusting the reg. pressure, and that is to readjust the HST after reg. alterations. 

FX royales/boss have the tendency to actually loose speed when the Hst is too tight, there is a way of diminishing returns here.
So, try to work your hst up with the increased reg. pressure, and I'm pretty confident you'll see the numbers you desire. There is a sweet spot.
My Bobcat Mk2 needed 150 bar reg. pressure to reach 900fps.

Kind regards from Belgium,

Gijs

 
Jking,

the brass front cap you are adjusting is only for minor adjustment--- that cap is the metal seat for the piston so if adjusted further away from the piston it will require more reg pressure to seat/cut off the air supply. if loosen to much CCW it will leak, that tension you feel is the oring pressing on the brass cap.

proper setting for the brass cap is to tighten till it bottom out then back it out 1/4 turn then adjust the reg pressure below:

Adjust the nut CW less then 1/4 tune while holding the brass piston with an Allen to prevent it from turning with the nut---the nut is screwed on to the end of the piston.

So what we are doing is adding more spring tension-----> so it require more pressure (regulated pressure) to shut off the air supply 

note:

​when you increase the reg pressure it will require more tension to open the valve and less when lower the reg pressure ---so the HSTA must be adjusted to get the highest speed. 

the MFR put thread seal on the HSTA, its best to heat to loosen the seal---it's vary easily to strip the hex, if you did manage to strip the hex---drill 2 small holes opposite from each other so you can use a strong needle nose pliers. 

 
Ernest, I'm confused I guess. I've attached a couple of photos so maybe that will help. My end piece is a brass looking hex screw then the stack of springs and then the knurled brass piece. I was holding the knurled piece with the pliers and turning the hex screw on the end CCW to get the small gain that I did when I quit yesterday evening.

You say adjust the nut which I could see in your video but mine doesn't have a nut just what appears to be a hex screw. I guess it's just a different style.

I'm following you and Gijs on the HS adjusting, My HS adjuster turns easily enough but not so easy that it would move on it's own.

I leave it alone until I hear back from you guys. I should have taken measurements yesterday when I first pulled it out but it never crossed my mind until this morning. I did take those measurements today though.
Jimmy
"]http://s1122.photobucket.com/user/kingji01/media/FX%20500/image_zpsnxm91chd.jpeg.html]
image_zpsnxm91chd.jpeg
[/URL][/url]
"]http://s1122.photobucket.com/user/kingji01/media/FX%20500/image_zps4cap25yi.jpeg.html]
image_zps4cap25yi.jpeg
[/URL][/url]
Looking closer at the last photo it appears the "hex screw" might actually be a different that what I was thinking. It appears that the outer ring has some plier scuff marks on it so maybe that is actually the "nut" you are referring to Ernest.
 
Well, curiocity got the best of me. I used a pair of pliers to hold the outter edge of what I thought was a hex screw which actually turned out to be the "nut". A round nut and not hex shaped. I still turned the inner hex screw CCW 1/4 turn to get my velocity back up to 885-890. Don't quite understand it all but heck, I'll go with it. Might tweak the HS a little now to see what that does.
jimmy

After shooting it a bit my velocity has leveled out at about 900-905. It's grouping well and is a lot quieter than before at the 860 range.
 
Dear Sniper,
I may learn too from you. My fx regulator has a hex nut and a grub screw and I can adjust the tension of washers by holding one and rotating the other.
Now I want to learn about the the brass part which comes in our view first of all when we want to pull the regulator from the chamber. It has two hole in which we put needles like tool and turn it CCW. It comes out. Then we pull the rest of the regulator.
Now when we re install the regulator we put that end part on the rest of the reg body and screw in CW. Then it becomes one unit and install it in the gun.
It appears from what you wrote that this end part should not be fully tightened. Rather it should be loosened 1/4 turn.
Is it?