New Beeman AR2079A is looking like a real winner.

Last week I received a new Beeman AR2079A from Airgun Archer Fun in Canada. It is a .177 with a small hpa tank. I already have a Beeman AR2078B side lever CO2 that I really really like so I decided to roll the dice again and go for the hpa version. It took some work to make the 2078B into the great shooter that it is, so I knew what I was getting into with this new one. It’s all part of the fun. The internals on these are rough, but we are talking about sub $200 rifles. They are truly diamonds in the rough however.
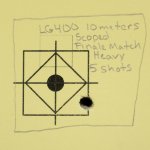
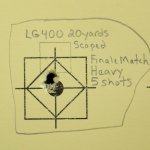
This 2079A arrived with the same heavy trigger with plenty of creep and grittiness. Sounds like she is wasting air and the cocking effort is rough and inconsistent. Just what I was expecting; and I am looking forward to tearing her apart and smoothing everything out. However, right off the bat I’m thinking that I have a real winner here. I’ve done nothing so far, not even cleaned the barrel yet, and she’s shooting groups like these. These are five shot groups, at 12 yards, with the included aperture sights. I was rested on bags. I’m sure the bore is dirty, I know the trigger is “challenging“, but I’m really happy with this performance so far. I haven’t put her over the chrony yet but I will soon.
Kenny
IMG_4991.jpegIMG_4997.jpegIMG_4994.jpegIMG_4992.jpeg
 
Last week I received a new Beeman AR2079A from Airgun Archer Fun in Canada. It is a .177 with a small hpa tank. I already have a Beeman AR2078B side lever CO2 that I really really like so I decided to roll the dice again and go for the hpa version. It took some work to make the 2078B into the great shooter that it is, so I knew what I was getting into with this new one. It’s all part of the fun. The internals on these are rough, but we are talking about sub $200 rifles. They are truly diamonds in the rough however.
This 2079A arrived with the same heavy trigger with plenty of creep and grittiness. Sounds like she is wasting air and the cocking effort is rough and inconsistent. Just what I was expecting; and I am looking forward to tearing her apart and smoothing everything out. However, right off the bat I’m thinking that I have a real winner here. I’ve done nothing so far, not even cleaned the barrel yet, and she’s shooting groups like these. These are five shot groups, at 12 yards, with the included aperture sights. I was rested on bags. I’m sure the bore is dirty, I know the trigger is “challenging“, but I’m really happy with this performance so far. I haven’t put her over the chrony yet but I will soon.
Kenny
View attachment 541227View attachment 541228View attachment 541225View attachment 541226
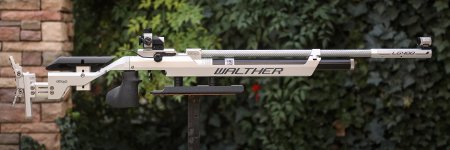
That's nothing to sneeze at, how about a pic of the whole rifle?
 
Last week I received a new Beeman AR2079A from Airgun Archer Fun in Canada. It is a .177 with a small hpa tank. I already have a Beeman AR2078B side lever CO2 that I really really like so I decided to roll the dice again and go for the hpa version. It took some work to make the 2078B into the great shooter that it is, so I knew what I was getting into with this new one. It’s all part of the fun. The internals on these are rough, but we are talking about sub $200 rifles. They are truly diamonds in the rough however.
This 2079A arrived with the same heavy trigger with plenty of creep and grittiness. Sounds like she is wasting air and the cocking effort is rough and inconsistent. Just what I was expecting; and I am looking forward to tearing her apart and smoothing everything out. However, right off the bat I’m thinking that I have a real winner here. I’ve done nothing so far, not even cleaned the barrel yet, and she’s shooting groups like these. These are five shot groups, at 12 yards, with the included aperture sights. I was rested on bags. I’m sure the bore is dirty, I know the trigger is “challenging“, but I’m really happy with this performance so far. I haven’t put her over the chrony yet but I will soon.
Kenny
View attachment 541227View attachment 541228View attachment 541225View attachment 541226
Do these new guns have the fake 2 stage trigger with a spring in it. I glued mine so it would not bend and it made a big difference. I really like my old co2 version I bought from Steven Archer, it's a tack driver. Mark
 
Nice! It looks like you got one with a really good barrel. Those groups should tighten up some once you get the bore cleaned and polished. The trigger-work won't hurt either.

A buddy of mine's really like wadcutter pellets, so don't forget to try some of those. It will be good to see just how well it can do.

Cheers,

J~
Thanks Treefrog. A couple of the targets in my post are shot with Finale Match Heavy pellets. Those are wadcutters. My targets are just thin printer paper so they tear easily and I don’t get the classic wadcutter circles. I agree that once I take the time to clean and polish the barrel, polish the hammer and the hammer pathway/ raceway and give the trigger some much needed attention, I should have a really nice shooter here. It also has the sound of extra wasted air. I think a B-Staley mod and or maybe a reduced power hammer spring might be in order. I’m going to have some fun playing and tuning this Spring.
Kenny
 
Do these new guns have the fake 2 stage trigger with a spring in it. I glued mine so it would not bend and it made a big difference. I really like my old co2 version I bought from Steven Archer, it's a tack driver. Mark
The trigger on this one looks and feels the same as the one on my co2 version. I’m assuming it is exactly the same inside as yours too. I also really like my first co2 model. It is a side lever cocking model. I like the feel of the side lever better but I’ve never seen the hpa tank offered on the side lever. I think that once I polish the hammer and hammer raceway and maybe reduce the spring a little bit I will enjoy this one a lot more.
Can you describe a bit more about glueing the trigger spring. That sounds interesting. Thanks,
Kenny
You might have to take the action out of the stock to see. when the gun is cocked and you pull the trigger the trigger blade moves till it hits it's stop ( fake first stage) because nothing is moving but the spring loaded trigger blade. I just pulled the trigger back to take up the spring and put a drop of super glue on the trigger so it will not move. I have a very nice and crisp single stage trigger with no take up. If we had the yellow forum archives we could look it up, that is were I learned about this trick. Mark
 
Even today, I think the QB trigger group continues to be the one of the best on any airgun less than 3x - 5x the price. Especially when given some attention. All the key features are there...a drop-sear design fully adjustable for pull weight, pull length, and overtravel.

At a minimum:
  • Smooth and polish the contact points of the sear and trigger blade. The sintered metal is hard as a rock so it takes some effort. Initial surface leveling is best done with diamond files or stones. Final polish with conventional methods. Reassemble with the tiniest bit of lube on the contact points. I like a 50/50 blend (by volume) of FP-10 and molybdenum disulfide powder.
  • Lighter spring - Install a lighter spring. One from a common ink pen works well, just cut it to length. Or if the sear and trigger contact points are polished well enough, you can move down to a spring so light that the spring may need a simple guide to keep it from folding (example pictured below).
  • Shim the trigger blade - an M3 washer on each side of the trigger blade takes up the side-to-side play.
And if you like a slight tactile wall just before the trigger breaks, replace the overtravel screw with an M5 or M6 spring plunger.

QB 01 - remove overtravel screw.jpg

QB 02 - tap.jpg

QB 03 - plunger installed.jpg


M5: https://www.amazon.com/uxcell-M5x12mm-Stainless-Spring-Socket/dp/B06XCW47P3
M6: https://www.amazon.com/dp/B06X3WRZFJ

Lastly, a couple of pictures of the lighter spring and improvised spring guide:
parts.JPG

QB 04 - trigger spring.jpg
 
Even today, I think the QB trigger group continues to be the one of the best on any airgun less than 3x - 5x the price. Especially when given some attention. All the key features are there...a drop-sear design fully adjustable for pull weight, pull length, and overtravel.

At a minimum:
  • Smooth and polish the contact points of the sear and trigger blade. The sintered metal is hard as a rock so it takes some effort. Initial surface leveling is best done with diamond files or stones. Final polish with conventional methods. Reassemble with the tiniest bit of lube on the contact points. I like a 50/50 blend (by volume) of FP-10 and molybdenum disulfide powder.
  • Lighter spring - Install a lighter spring. One from a common ink pen works well, just cut it to length. Or if the sear and trigger contact points are polished well enough, you can move down to a spring so light that the spring may need a simple guide to keep it from folding (example pictured below).
  • Shim the trigger blade - an M3 washer on each side of the trigger blade takes up the side-to-side play.
And if you like a slight tactile wall just before the trigger breaks, replace the overtravel screw with an M5 or M6 spring plunger.

View attachment 541374
View attachment 541375
View attachment 541377

M5: https://www.amazon.com/uxcell-M5x12mm-Stainless-Spring-Socket/dp/B06XCW47P3
M6: https://www.amazon.com/dp/B06X3WRZFJ

Lastly, a couple of pictures of the lighter spring and improvised spring guide:
View attachment 541393
View attachment 541395
Thank you for the detailed explanation and the photos. I appreciate it.
Kenny
 
I just looked at the enlarged picture of your trigger and it is like mine , a stamped metal trigger not a solid metal trigger that nervous trig is showing. Cock your gun and see how far you can pull the trigger and you will see the trigger moving and nothing else. Here are some pictures of what our trigger looks like. If you look at the second pic you can see a shiny spot, that is the end of the spring I am talking about. That spring lets the trigger move causing travel. After putting a drop of glue to remove that travel my trigger is nice and crisp without doing anything that nervous trig did. Mark
IMG_20250223_142725.jpg
IMG_20250223_143240.jpg
 
  • Like
Reactions: TnCnDn