Tequila Gun PCP

Ask the German shooters with how many foot-pounds of energy they are allowed to shoot pellets....


6.
In words: six.

6 FPE is the maximum power allowed in Germany. 😖

The attempt to get a gun license and hunting license would send you down a treacherous path of
● months of studying for a college-level graduating exam,
● spending a four-digit amount of money, and
● trying to prove to a gang of gun haters why in all that is holy would you need a bb gun with more than 6FPE. 🤷🏻‍♂️


HogKiller was needing a 6-letter word to describe the fools making the gun laws in Canada...?

➔ Well, to describe their German colleagues HogKiller might consider using a whole string of expletives....


It's easy to forget how the US with its 2A is far ahead of most other countries in the world. 👍🏼

Matthias
I did have other words, but didn't want to get dinged. I'm behind enemy lines, this is a quote from some San Jose PD swat guys that trained me, in CA, I'm sure at some point the geniuses in Sack-0-Tomatoes will focus on air guns in their quest of their our safety.
 
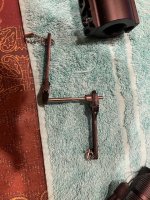
Tequila Gun valve rebuild: Total time 30 min

Tools needed:
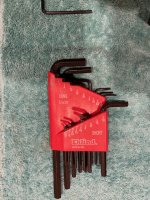
7/64 & 3/16 Allen Wrenchs
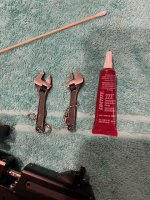
SMALL Crescent wrenches
Purple or similar loctite i.e. removable

Bleed the air reservoir/tank

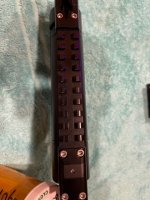
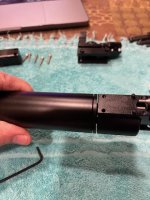
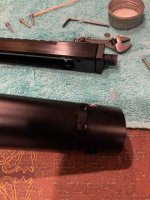
1. Remove the 6 - 7/64 screws from the top of the barrel assy. DO NOT LOSE the delrin piece under the barrel assy.
2. Unscrew the air tank, it's hand tight, there is an o-ring in there so be careful removing it
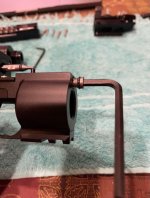
3. Unscrew the 3/16 screw
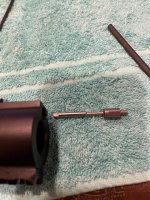
4. tip the gun and the valve rod will fall out
5. use the Crescent wrenches to CAREFULLY unscrew the valve assy it is snug, possibly some heat may be required. YMMV
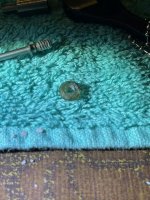
6. Clean out the i.d. threads. This is where you make a choice, put a TINY bit of loctite in the threads or put a tiny bit on the male threads
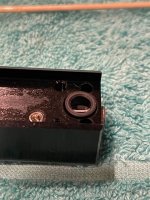
7. Replace the Square Profile-ring in the housing. (https://www.mcmaster.com/catalog/129/3960/1170N16)
8. Screw the shaft into the Square Profile-ring and housing, tighten slightly.
9. Apply a light touch of oil on the shaft, I use Mobile 1, very light.
10. Drop it into the housing the way it came out.
11. Lube the threads and the 0-ring on the air tank and reassemble, hand tight
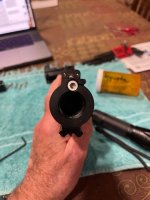
12. Rotate the ring on the front so the threads are up.
13. Replace the barrel assy.
14. Inert the two screws making sure they go into the front ring, do not tighten
15. Replace the 4 rear screws.
16. Slowly tightening the screws evenly to assure alignment., then lightly torque, my guess is 10 - 15 inch pounds MAX.
17. Refill with some air and test.

IMG_2493.jpegIMG_2494.jpegIMG_2481.jpegIMG_2490.jpegIMG_2482.jpegIMG_2483.jpegIMG_2484.jpegIMG_2486.jpegIMG_2487.jpegIMG_2488.jpegIMG_2489.jpegIMG_2491.jpeg
 
Last edited:
Tequila Gun valve rebuild: Total time 30 min

Tools needed:
7/64 & 3/16 Allen Wrenchs
SMALL Crescent wrenches
Purple or similar loctite i.e. removable

Bleed the air reservoir/tank

1. Remove the 6 - 7/64 screws from the top of the barrel assy. DO NOT LOSE the delrin piece under the barrel assy.
2. Unscrew the air tank, it's hand tight, there is an o-ring in there so be careful removing it
3. Unscrew the 3/16 screw
4. tip the gun and the valve rod will fall out
5. use the Crescent wrenches to CAREFULLY unscrew the valve assy it is snug, possibly some heat may be required. YMMV
6. Clean out the i.d. threads. This is where you make a choice, put a TINY bit of loctite in the threads or put a tiny bit on the male threads
7. Replace the Square Profile-ring in the housing. (https://www.mcmaster.com/catalog/129/3960/1170N16)
8. Screw the shaft into the Square Profile-ring and housing, tighten slightly.
9. Apply a light touch of oil on the shaft, I use Mobile 1, very light.
10. Drop it into the housing the way it came out.
11. Lube the threads and the 0-ring on the air tank and reassemble, hand tight
12. Rotate the ring on the front so the threads are up.
13. Replace the barrel assy.
14. Inert the two screws making sure they go into the front ring, do not tighten
15. Replace the 4 rear screws.
16. Slowly tightening the screws evenly to assure alignment., then lightly torque, my guess is 10 - 15 inch pounds MAX.
17. Refill with some air and test.

View attachment 409384View attachment 409385View attachment 409388View attachment 409396View attachment 409389View attachment 409390View attachment 409391View attachment 409392View attachment 409393View attachment 409394View attachment 409395View attachment 409397
Hog -

What caused you to have the need for the valve work in your gun ?

Mike
 
  • Like
Reactions: Bandito and Xolotl
Hog -

What caused you to have the need for the valve work in your gun ?

Mike
The Square 0-ring died, just as simple as that, for a change I didn't mess it up. Pressure didn't drop over night so it held well, did a few shots this am and it appears to work fine, but I haven't gotten down to below reg pressure yes. As I've noted before, this gun is to friggin' precisely machined/designed you can tear it apart, reassemble and be on target. Also a note, in chatting with Xolotl he's of the mind that the Loctite helps to reduce leakage along the threads. It is possible that because I put the minute bit of Loctite on the threads then put on the seal a tiny bit actually got on the ID of the seal, sealing that point. Remember kids use REMOVABLE thread sealer. I have more on order, in on Monday. I'm going to see what I torqued the barrel assy. to and update the procedure, IF I have the right 1/4" hex wrench for my torque wrench.

 
  • Like
Reactions: Bandito and Xolotl
Interesting, thanks.
Mine's still good...so far. You obviously shoot your Tequila Gun more than I shoot mine. I have a bunch of guns, so I alternate. I may not shoot the same gun for a month from the last time shot. Add to that, the time that I just don't do any shooting.
Plus I just bought a car (hot rod), that both needs some fixen, but also needs general go around tightening of nuts and bolts. Replacing of old chassis parts. It's a street legal car that can run in the 10 second bracket on the drag strip. So yeah, been spending hours laying on the concrete, my back !!!

Mike
Not really, it's been several weeks, I may have 400 rounds through it and that's optimistic. There was no obvious issues but, it was evening, the light sucked and I didn't closely examine it with a loop. I did notice that the sealant had hardened completely and was flaking off on the back side of the ring. I don't have a lot of experience with Loctite so I can't say if this is normal or not for the softer stuff. The ring sits inside of a recess on the larger piece of pic #9, then butts up on a shoulder on the left, that area is what seals on the seat on the left or longer side inside the gun. If you blow up the image you can see the seal/0-ring. Hope that makes sense.
 
  • Like
Reactions: Bandito and Xolotl
Hey Xoloti -

In your "spare" time, do you think that you could come up with a "rear" mount for an RMR (Trijicon, Holosun footprint) sight mount ? The Trijicon and Holosun are two very popular, high quality, reflex sights.
Something like these ?

You can make it a tight/slip fit into your existing dovetail on the top of your receiver.
Something like this -
Notice the "dovetail" male dovetail under the mount plate. It would slide into your existing cutout.
OR...what dimension did you use for the groove in your receiver ? If you used an actual 1911 dimension, we can buy this type of mount that already exists to put onto your receiver.

1701532159364.jpeg

1701532232345.jpeg


Mike
 
  • Like
Reactions: Bandito
Hey Xoloti -

In your "spare" time, do you think that you could come up with a "rear" mount for an RMR (Trijicon, Holosun footprint) sight mount ? The Trijicon and Holosun are two very popular, high quality, reflex sights.
Something like these ?

You can make it a tight/slip fit into your existing dovetail on the top of your receiver.
Something like this -
Notice the "dovetail" male dovetail under the mount plate. It would slide into your existing cutout.
OR...what dimension did you use for the groove in your receiver ? If you used an actual 1911 dimension, we can buy this type of mount that already exists to put onto your receiver.

View attachment 411589
View attachment 411590

Mike
I have a designed for you request. Let me check if it is compatible

IMG_2892.jpeg


IMG_2893.jpeg
 
Hey Xoloti -

In your "spare" time, do you think that you could come up with a "rear" mount for an RMR (Trijicon, Holosun footprint) sight mount ? The Trijicon and Holosun are two very popular, high quality, reflex sights.
Something like these ?

You can make it a tight/slip fit into your existing dovetail on the top of your receiver.
Something like this -
Notice the "dovetail" male dovetail under the mount plate. It would slide into your existing cutout.
OR...what dimension did you use for the groove in your receiver ? If you used an actual 1911 dimension, we can buy this type of mount that already exists to put onto your receiver.

View attachment 411589
View attachment 411590

Mike
Except for esthetics what's the point? Ok, it'll make getting a holster easier, but for us with the OLD model, we're stuck...wimpering.
 
  • Like
Reactions: Bandito
Except for esthetics what's the point? Ok, it'll make getting a holster easier, but for us with the OLD model, we're stuck...wimpering.
Hog -

Just HOW old...is your TequilaGun ?
Mike is #009, and it has a dovetail notch in the top of the receiver.

The main reason for me, is that there is less "swinging" around of the sight while aiming !!
Your wrist is the "pivot point" while aiming. The grip is as closest to that centerline point. The further away from the "center" or pivot, that you put the sight, the more it moves back and forth, the more difficult it is to hold on center.

And at my age, I need all the help that I can get !!

Mike
 
  • Like
Reactions: HogKiller