Air Arms Utah Airguns Pyramyd FX Airguns Daystate Airmaks Airguns Diana Airgun Depot Edgun West Palm Beach Airguns DonnyFL
Saber Tactical Optisan Side-Shot Scope Cam NE Airguns Baker Airguns AGS Topgun Airguns Predator International The Pellet Shop Huben Airguns Huma-Air Shooting Supplies Hurricane Luftvapen AEA Precision Airguns H&N Impulse Air ZAN Projectiles Hawke Optics Kraford and Lypt Airforce Protect Your Nuts Stud Mag Loader RX Target Systems Sports Match Scope Mount Specialists Altaros Slugs Banner CTA Thomas Air Performance Air Rifles Hatsan USA Georgia Air Guns SPAW Minor Skout Airguns RAW - Rapid Air Works Nielsen Specialty Ammo Patch Worm Weihrauch Sport Talon Tunes Airgun-Revisions JTS PARD ST7 PPP RTI

Optics  NLA Sightron S-TAC 4-20X50 FFP ZS IR (reduced)

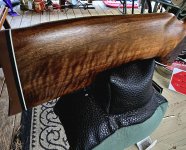
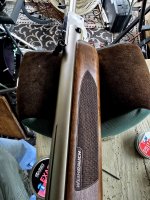
Very good condition, did manage to put a big ol' scratch in the battery cover as seen in the photos. Very faint ring marks in the right lighting. Everything works as it should (adjustments, illumination etc). Original box & paperwork. Happy to answer any questions you have about the scope.

$350 shipped CONUS, PP F&F or USPS money order.

PXL_20240808_223708362.jpg

PXL_20240808_223721112.jpg

PXL_20240808_223735657.jpg

PXL_20240808_223837390.jpg


PXL_20240808_223708362.jpg


PXL_20240808_223735657.jpg

My Notos Nightmare

Hi everyone.

So I decided to put a Moderator adapter on my Notos. Sounds eas, the video made it look easy, wasn’t easy. Sure screwing on the adapter was easy, but that shroud removal was just a horror. I finally got it done after doing a variety of sketchy things. I almost used heat, but refrained for fear of warping the barrel. Does anyone have a trick they know on how to do it with less hassle?
  • Wow
Reactions: Firewalker

Traditional Rifle  SOLD HW77

I would like to sell my HW77 beech stock, I bought it from AOA and have had it about 2.5 years. It is well kept and wiped down every time I shot it. Probably about 6 or 7 hundred pellets through it. Its wearing a UTG 3-12x32 mil-dot bugbuster scope with side parallax. reason for selling: I'm looking for something new. Gun, scope, rings $550.00 shipped. PPFF or post office money order is preferred. contact me if interested and we can go over details on the phone. Thanks. Sorry I forgot to mention its .177cal

06.jpg

Results  OKCGC N50 results 8-3-2024

air gunners logo ideas-04 - Copy (2).jpg
OKCGC LOGO.png

Oklahoma City had their N50 match and what a blast we had!!! Here are the scores. some photos and a little write up for the OKCGC's N50 Match for August 3rd 2024. We had a few shooters show up, yepper 28 entries, five of which shot in both matches!!! Man it was great to see that many shooters having fun and shooting the N50 Bench match! The weather was hot yes but the wind was pretty mild. Right at 100 degrees and wind was 3-5 mph.
We want to thank all our guy that help with this match. You guys are the best, we Thank you very much!!! I will let the score sheet and photos tell the story, thanks Thom and Randy for these!
...The AirGun Group of OKCGC... :eek::unsure:


1723147898985.png


image3 (16).jpeg


image0 (18).jpeg
image0 (20).jpeg
image0 (21).jpeg
image0 (22).jpeg
image0 (20).jpeg
image1 (14).jpeg
image1 (15).jpeg
image1 (17).jpeg
image4 (7).jpeg
image3 (15).jpeg
image3 (14).jpeg
image3 (13).jpeg
image2 (15).jpeg
image2 (14).jpeg
image2 (13).jpeg
image2 (10).jpeg
image1 (19).jpeg
image1 (18).jpeg

PCP Rifle  NLA Brocock Sniper XR regulated PCP rifle .22cal $1,250.00

Hello everyone,

I am listing my like new Brocock Sniper XR, .22 cal, regulated PCP air rifle. I purchased this rifle new from Airguns of Arizona in November of 2023 and have not modified it in anyway. This is a very accurate rifle and I have posted a lot of shot targets here on the Forum, here is a link beginning some of the post:

( https://www.airgunnation.com/threads/what-paper-target-did-you-shoot-today.1285086/page-29 )

It comes with all original items including 1-factory magazine plus 3 - CARM magazines and 1 - Maple magazine ( over $115.00 ) and factory box and outside shipping box. The scope and rings do not go with the sale. I am a shooter and not a collector and when I do not use a gun very much then I put it up for sale. Everything on the rifle works perfect and hold air as it should. NO TRADES.

Free shipping to lower 48 states only.

I have this listed on my website so it can be purchased with a credit card.

Please contact me if you have any questions.

Thank you, ThomasT
Brocock Sniper XR.1.jpg
Brocock Sniper XR.3.jpg
Brocock Sniper XR.4.jpg

PCP Rifle  SOLD REDUCED TO SELL! Safe Queen, FX Impact M3 Bronze, .25 Sniper with or without accessories.

Price reduced below to fund a new project.
Safe Queen, FX Impact M3, bronze, .25, excellent condition!


Tuned and resealed by "Utah Airguns" Dec. 2023 to shoot Zan 35 grain slugs at 980fps, accurately!

Gun only with bi-bod, rear bi-pod, one magazine, one box of Zan 35 grain,(no scope or other shown accessories) $1,800.00, NOW,$1,700.00!hard case included with manual,

Gun package as seen in the pictures (Scope not included),Hard case included with manual!!
$2,400.00 NOW $2,200.00!!!

Paypal family and friends or you pay the extra fee.
Free shipping to CONUSA only.
Sorry, no Trades please.


IMG_4403.jpg

IMG_4387.jpg
IMG_4388.jpg
IMG_4389.jpg
IMG_4397.jpg
IMG_4399.jpg
IMG_4400.jpg
IMG_4402.jpg


IMG_4403.jpg


IMG_4401.jpg

PCP Pistol  SOLD Custom Theoben Rapid MK2 Pistol .22cal

Looking to sell . Theoben Rapid pistol .22 cal
costumed by Martin. For my Niece who wants Full size target rifle…
Resealed/ tuned
Carbon fiber shroud
Modified safety catch and barrel
ODB 160 moderator 1/2 unf
1 magazine w/ hard case
IMG_1439.jpeg
IMG_1441.jpeg
IMG_1440.jpeg
Hawk frontier 4x20x 44 1 inch tube
One piece with scope
1050.00 TYD lower 48

Usual payment methods accepted

Fast shipping means repeat business

So I placed 3 orders with 3 different companies that advertise on this site and are well known. One order the part needed to be assembled and we communicated back and forth on options a couple days, their the smallest of the 3 by far took 15 days from order to door very reasonable thanks Tim /SPAW. Next was airgun depot, order placed on 8/5 on 8/6 I had a tracking number and it’s going to be delivered on 8/8 out for delivery as I type this Awesome, next and probably the last time I’ll use them but won’t mention their name order placed 7/21 all 4 items in stock no guns to be tested just accessories and all I got is an order confirmation number, at least send an email saying yeah we’re behind in shipping for blah blah reason but at least give an estimated ship date when you dump $900 you start getting antsy.

Traditional Rifle  FOUND HW77K in .22 Caliber (old style stock)

Hi airgunners!

Im looking to buy a nice .22 caliber HW77K in the old style stock (like in the picture). I would possibly consider one with the current style stock but prefer the old style.

If you have one that you are no longer shooting but want it to go to a good home where it will be exercised and cared for, please contact me through PM. Let’s see if we can make a deal and get some lead flyin’!

Thanks for looking!
Brett

IMG_6124.jpeg

Air Force on CO2?

I've had this Air Force model R0401 rifle for a number of years and want to put it back in use. It has the CO2 adapter and that's all I've used in it and would like to know where the CO2 filled tanks can be purchased or refilled? The one on it now is marked JT 12oz and screws into the rifle's adapter. Any help will be appreciated. Charles

Imagine getting your wife/gf into airgunning?

So, my "ole lady" is a PB girl. Has been all her life. At 18 she bought her first gun which is a pre-1967 Dan Wesson .44 Magnum in stainless steel. After all these years she still has it. I own 4 handguns and an AR. I believe she owns about 30 all together. Never had an interest in airguns till one day recently she found a nice variety of free printable targets online. She thought they were cool and suggested I shoot some of those. I agreed and she stated that she would be interested in shooting them as well. Shortly into my first session of shooting these targets she asked to jump in.😯 I can't describe how happy I was! We buy cool targets to take to the range and compete against each other whenever we go. Now we can do the same thing at home for a lot less $$.
As of late, she keeps up with pellet inventory and pushes me to keep steady deliveries coming so we don't run out.
Is this a dream come true or have I inadvertently created a monster?🤣
She is now browsing AoA casually ( every couple days) to find something she might like. I guess I'm "in for it" soon.
Well now I don't have to shoot alone anymore. Maybe I need to buy a lottery ticket soon since I've been graced with this gift!

Bipods/Rests  SOLD Atlas PSR BT46-LW17 bipod

***SOLD!***

Here’s a like new Atlas PSR. I’m just more of a CAL guy, so letting this one go. It’s like new aside from some wear on the feet and an “L T” on the front and rear that the prior owner marked on it with silver Sharpie that should come off with a touch of acetone.

Looking for $280 shipped Priority. I have LOADS of references at other forums that I can provide if you’d like. Thanks!

IMG_5268.jpeg


IMG_5269.jpeg


IMG_5270.jpeg


IMG_5271.jpeg

RTI  Prophet 2 performance

Actually, it’s the 2.1 at this point. I know the difference is the CFB vs aluminum one on the standard version. I’ll assume RTI has kept their tradition of making the cocking lever non reversible, I believe the Mora is also following that setup. Anyways, how many extras are needed to appreciate this guns full potential? I see several necessary,
1 - bag rider
2- extended bottom rail
3- mod
4 extra mags
Does the gun really show up for the number it will run? Especially in 30 cal? Or does one simply go for the mora? Obviously, I’m interested in opinions from owners. I know you will generally like the gun, or you wouldn’t have it still. But does it bring that smile to your face still?
  • Like
Reactions: Rizz01

Daystate  New (to me) Redwolf is SHOCKING

Just got my Redwolf Safari HP .25 yesterday and I'm loving it! It was originally used for competition and it just ROCKS. This one came with a LW polygonal barrel in a 1:30 twist. The trigger is barely a 2 once break at the second stage. It's programming has been altered to shoot 33.9 grain @ 934 fps on the "high" setting. Medium is shooting 29.5 grain pellets @ 936 fps. I upgraded the bottle from a 480 to a 580 CF. Between yesterday and today, I've gone through slightly more than 2 tins. This gun is tough to put down since it's so accurate.
The Redwolf did exceptionally well in the 8 mph winds we were experiencing.Both pics were at 75 yds. Bottom pic is 20 shots. Top pic, I just got silly and shot out the numbers.
20240807_192455.jpg

20240807_192229.jpg

Fish eye effect on new DNT Zulus

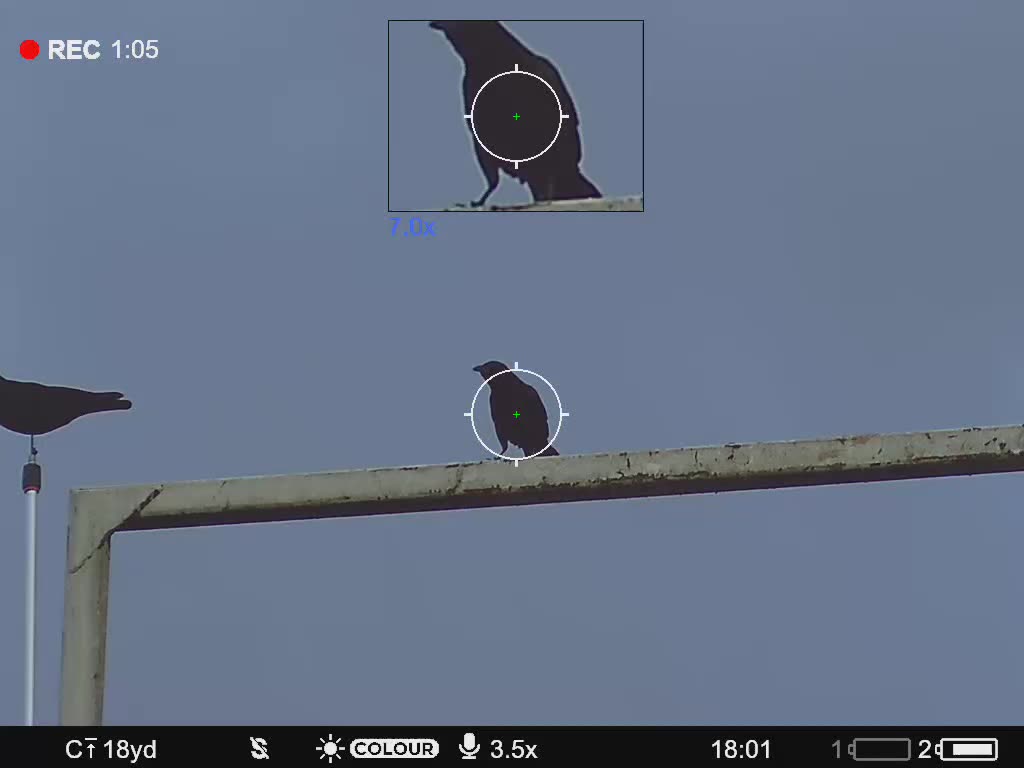
just received the 5-20 model and installed, took it for a run last evening to be amazed at the clarity
in full color at dusk and B/W for after dark. awesome picture, but........
in top left quadrant of the picture there is a fish eye effect thats not noticed anywhere else.
appears between 10-20X.
does anyone else experience this ?
love the optic and hope to find that it is, or is not normal.
thanks for looking (y)

How to Use a Corbin S Press - A Thread Geared Toward Beginners

**THIS THREAD IS A WORK IN PROGRESS.**
If you stumbled across this thread and you're unfamiliar with the Corbin S Press or don't know what swaging is, listen to Dave Corbin explain the basics of bullet swaging and swaging airgun slugs.

Also take some time to click some links below.

Air Gun Pellet (Slug) Swaging Information


Corbin Press Info http://bulletswage.com/csp-1.htm

Corbin S Press Airgun Slug Kit (package deal) https://www.corbins.com/shop/s-press-airgun-slug-kit-press-die-slicer-lead-lube-1578?page=5#attr=702

Corbin S Press Diagram:​

I'm still working out the correct labels, so bear with me. I'll get it together. Thank you @Feinwerk for your example and assistance on how to label photos.
Corbin S Press w:bench stand front view Labeled1.jpg


Now on to the business.....First off I'd like to apologize for not recording myself setting up my Corbin S press from scratch because I haven't seen that video yet using the bench stand. In fact, I have watched several videos online and I have searched the Corbin sites. The new site has yet to compile and transfer resources form the old site as seen below. I think this will be updated in time.
Screenshot 2024-08-07 at 1.03.07 PM.png

Much of what's on the old site is, well it's old. What I found was the same video from the 1990s that’s included on a DVD that comes with the S Press that starts with an already assembled and setup press that doesn't look like the current S Press currently being sold in 2024. It also does not show enough detail about how to use the die sets for making airgun projectiles. Instead it focuses on making jacketed bullets. It then goes into using the more complex H Press. Here is a link to that video via the old Corbin site http://bulletswage.com/howto.htm
As a result, I have determined that updated videos and more thorough instructions are needed. I may have missed something, but from my observation the information that is readily available seems better suited for people who already have some sort of background in bullet making or reloading.

Edited to add video: 08/15/24
Excellent hollow-point and hollow-ogive slug making video by the folks at Corbin shared with me by @Long_Shot. Good demo of using different dies & punches.

Other resources currently available on the new Corbin site:


I wanted to start this thread for the complete novice and those of you who may be new to the concept of swaging projectiles. Swaging is simply a method of using mechanical leverage to create extreme pressure in order to cold flow (mold) solid lead into a precision formed projectile. This is done by placing a solid piece of lead (a core) into finely machined die that contains the lead as it is forced into the precise internal dimensions or shape of the die. Dies function in conjunction with punches. These punches form the ends of the projectile (the base and the nose or tip) and contain the lead so that it remains in the die. There are tiny holes in the Corbin dies that allow any excess lead to bleed off (the excess lead from the bleed off is called “sprue”) making it possible to repeatably press projectiles that are very close to the exact same weight. This definition is my own and the description of the swaging process is how I understand it. Feel free to correct me if I've erred. Here is how the folks at Corbin explain swaging https://www.corbins.com/blog/swaging-101-1/what-is-bullet-swaging-5
I'm not a tradesman and I am not naturally mechanically inclined or handy. I can do very basic things with tools, so if you're anything like me, this thread is for you. For current owners and those with more advanced knowledge this is an opportunity to share your videos, knowledge, and expertise with others. At least three of you have been very helpful in making yourselves available to assist me and I thank you all. One person has been @Ca_Varminter. He has been extremely helpful to me with understanding the setup. He has also been helpful in other areas of air gunning as well. @nielsenammo was very helpful to me early on when I was still trying to figure out which press to buy and how to approach swaging. Nick’s candor has been very helpful and very much appreciated. Now they sell lead wire for airgunners just to help us out. Another extremely helpful member has been @CBuasri . He's checked in on me to see if I've had any difficulties or needed assistance. These folks are among the great members of our airgun community.

I started looking into to swaging about 3 years ago because during the pandemic strange things occurred logistically with products and material that caused delays in delivering projectiles to their markets. Although I managed to maneuver around most of what people thought were shortages, I wanted to be able to make what I wanted, how I wanted it, when I wanted it. I also looked into casting, but once I found a projectile that my gun liked, I wanted to be able to make my own and to have a process with excellent consistency. My first PCP was a big-bore Benjamin Bulldog .357, so eventually I'd have arrived at the point of making my own projectiles. At some point I bought a used modified Bulldog from a fellow member and with the gun came some advice on a projectile that it shot well. Not only did the modified Bulldog shoot the projectile well, every Bulldog I shot was able to shoot the same projectile well. At that point I decided it's time that I learn to make my own. Then the search for the right setup began. You can search the AGN threads for posts, threads, and conversations about that.

Here's a photo of my S Press just after setting it up.
IMG_5621.jpg


Photos of how my dies and punches are currently stored after cleaning and oiling
IMG_5628.jpeg

IMG_5629.jpeg


Setting Up Your Corbin S Press:​


Here's the new Corbin video on how to set up the S Press.

In setting up my press I encountered several obstacles -

1) I wanted a dedicated workspace for swaging, so I bought a workbench just for making projectiles. The first problem was that it arrived with a busted wooden top. Thanks to @Rob_in_NC I was able to mend it, well sort of. I didn't know what I was doing, asked for his advice, watched a few videos on YouTube, bought a couple of clamps, and winged it with wood glue. I won't bore you with all of those photos, but it worked well enough. The top had 3 cracks, 1 was over 12" in length and broke all the way through this inch thick piece of pressed wood.
IMG_F1834D1EB007-1.jpeg


My half-hearted and haphazard attempt to mend the break.
IMG_5624.jpg

It mended well enough to use and the company refunded my money so the workbench was free.

2) The next issue was to wait for my bench stand to arrive. I ordered it thinking they were in stock. When I ordered my press they were not and I was not given a specific timeframe when they would have more. I was told they'd have to make more. When I placed a second order I saw them listed and assumed they were back in stock. After ordering I found out that they were not. I told Kelly not to worry I'd like all of my items to ship together. He gave me a two week timeframe and my bench stand was finished and shipped within that timeframe.

3) Once the stand arrived, my next issue was the metal frame beneath the wooden workbench top. I had not anticipated the metal table frame interfering with the press installation . I did not want to drill through it and I found that you want this press close enough to the edge of the table so that the lever's range of motion is not obstructed and you can fully utilize the leverage of the cam action, but not so close that it will eventually crack the edge of the table top with repetitious torquing.

Here are some photos of the metal close to the edge from beneath the workbench tabletop.
IMG_5548.jpg

IMG_5549.jpg

So my dilemma was the question of "how do I avoid drilling through metal while allowing the lever enough room to go through its full range of motion?" I posed this question to Corbin Manufacturing and via email received no response. I ended up coming up with a decent solution. At first I thought this placement might work since the metal frame is not as wide beneath the short edge of the table.
IMG_5625.jpg

However, this does not leave enough room for the lever to go all the way down. I thought the height of the stand would make a difference, but it only affords you about 12". This height saves table space and makes swaging while standing more comfortable.

I finally decided to situate the bolts on the front of the bench stand on one side of the metal table frame and the other behind it. The end result afforded me enough space from the edge to where I don't think the stress of pulling the press handle down repeatedly will break the wood at the edge off the table over time. The downside is that my placement is very close to the metal frame towards the edge. So close that I needed an adjustable crescent wrench to hold the nut below the table top because a socket cannot fit over the nut. But hey, it worked out. To install a bench stand you must supply your own bolts. I used four 1 ¼" long, 5/16-18 bolts. I also bought some 1 ½" and 2" long bolts of the same size. Ideally I would think 1 ½" are best if you don't have anything obstructing you from tightening the nuts.
IMG_5555.jpg


4) The next issue I encountered was rust on one of my punches. My press sat in the box for a while until the additional components that I ordered arrived, I got my table setup, and I made time to setup my press. I did not want to drill holes to mount the press before the bench stand arrived to only have remove it and drill different holes in workbench to mount it leaving holes in my tabletop. When I finally went through all of my dies and punches I noticed rust on a base punch. I contacted Corbin via email about this (including the photo below) explaining that when I noticed this, I tried removing the rust with steel wool, but it didn't seem to work well. I was also concerned about using steel wool close to the polished surface. So I asked what they suggested that I do. In response I was told "light steel wool will remove it easily and keeping a little bit of swage lube on it when stored will help." I'd already tried steel wool and it didn't remove it easily. I don't know who replied via email, there was no signature or name used. Before I received a response I had oiled all of my dies and this punch with Ballistol until I can find something better to use. I got that from a document published on the old Corbin site about caring for the dies. I will probably call them later today to get a more satisfactory answer. This is not me throwing anyone under the bus. I'm communicating to you all issues that I have encountered so far on my journey.

Here's the rusty punch before using steel wool on it. I'll add a photo of the after when I take it out again. It's been oiled and stowed for now. I still have not used it.
IMG_5617.jpg


Here is a photo taken after my initial steel wool treatment.
IMG_5632.jpeg

I sent the photo to Corbin via email and Kelly responded. In his reply he told me that it looks ok, but I can also use a fine grit sandpaper (600 grit) to clean it up a bit more. My only concern about that is making sure that I remove all granules and debris before using this punch and being careful not to scratch the polished surface considering that the rust reached the border area of the different surfaces of the punch. You may wonder, how did this rust occur? We’ve had severe weather that knocked out our power a few times this summer. A couple of tornadoes came through last month and knocked the power out for an about four days. No a/c and high humidity would be the only thing I can think of that could cause this sort of thing. I hadn’t thought about oiling my punches before I made time to set up my press. Something to think about if you live in a humid climate and/or you don't intend to set your press up immediately upon arrival.


I'll be editing and adding to this thread periodically, but I'd like to begin compiling good information as I find it.

Here's a video on "Core Making" (*I do not recommend using shot to make cores. I think it's best to use a solid piece of molded or extruded pure lead wire.)

2 (.5, .5, .5) rodents down

Went out to my permission this am 0730 with my faithful retriever Pete. Bright sunny day barely a breeze so it was WARM. An official, where in the H are the rodents? Last week they were there then disappeared when I drove in, this time we went in the back way and NOTHING. We were getting set up, Pete walked my target out to 75 yards, while I unpacked the .25 Raptor that will be using the RMR/FX Hybrids at 1040fps. Started plinking at the big steel and missing so started dialing it down and down and down and, ok hit it, smaller size steel, a bit of tweaking and hit it then the 1.25" steel, hit it, good enough. Oh look a rodent at 100 yards, a few shots to annoy it, started coming down on my elevation and SMACK down it goes. Pete goes to get pics and move the body so the buzzards can see it. Slugs are flying pretty flat...hummmmmm. Oh have two at 50 yards, dial down and SMACK got one, reload and SMACK got the second. 1st wasn't a good kill still moving but it was in the heart lung area (picture), 2nd one...not a clue where it went, we both heard the hit. Two more pop up in a different location 100 yards out, dial up....SMACK, we watch it go down, reload, SMACK on the second, go out to find the bodies and.....nope nothing. It's appearing that the slugs are passing right through....HUH that's not suppose to be happening. Going to try some 32 gr AVS .253 dia slugs in the JSAR Raptor for giggles. ON the RMR's I may try to open the nose a bit and see what happens, I don't have a lathe so it's going to be pretty messy

Note: I sent my drone out to find #1, last pic of location, had a hell of a hard time spotting it, you can see why...little sucker just blends right in.

1723058379221.png
1723058464429.png
1723058621785.png

smile for the camera young man

i was away from my place a couple days due to a storm here in FL, so had to leave my chickens free to roam .. i keep it fairly clear around here but its been awhile since i staked things out, obviously a new threat moved into the area .. came home to 2 dead chickens and a 3rd mauled .. could have been worse, but we needed some payback .. took several hours to show up, i was dozing off but the motion detector got me up .. one shot from the .35 benji and problem solved ..

20240807_001409.jpg

Filter